ML.NET Object Detection
Machine learning is one of the most disruptive technologies of the last decade and is projected to be valued at $8.81 billion by 2022. There has been a massive growth in this industry mainly owing to its propensity to continuously improve and get better with time. To leverage this rapid growth, Microsoft introduced an open-source model-based machine learning framework called ML.NET for .NET developers to integrate machine learning functionalities into their applications. The framework offers tools and features to help you easily build, train, and deploy high-quality custom machine learning models locally on your computer without requiring prior machine learning experience.
ML.NET includes tools like ML.NET Model Builder and ML.NET CLI that can streamline the process of integrating machine learning applications into your application. Model Builders can have various types of predictions or scenarios, based on the input data. In our previous blog, we spoke in detail on how to train and add Image classification to our projects.
In this blog, we will speak specifically about Object Classification. It can be considered as an add-on to the image classification feature. With image classification, it can classify the object in the image into types, whereas with object classification, it locates and categorizes entities within the image.
Pre-requisites
To get started, we need to download and install the following:
- Visual Studio 2019 or later or Visual Studio 2017 version 15.6 or later with the “.NET Core cross-platform development” workload installed.
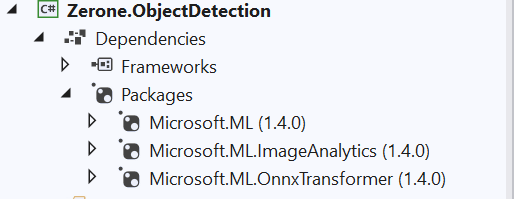
- Microsoft.ML.Image Analytics NuGet Package
- Microsoft.ML.OnnxTransformer NuGet Package
- Tiny YOLOv2 pre-trained model
- Netron (optional)
Pre-trained model
There are numerous models available that are pre-trained to identify multiple objects in images. For the purpose of this tutorial, we are using a pre-trained model called Tiny Yolo2 in Open Neural Network Exchange (ONNX) format. Tiny YOLOv2 is trained on the Pascal VOC dataset and can predict 20 different classes of objects.
The ONNX is an open-source artificial intelligence ecosystem that helps with interoperability between different ML frameworks. With ONNX, developers can move models between state-of-the-art tools and choose the combination that is best for them. It is developed and supported by a community of partners.
The Tiny YOLOv2 model is downloaded from the ONNX Model Zoo, a collection of pre-trained models in the ONNX format.
Getting Started
In this section, we will take a look at the code to develop an object detection model using Tiny YOLOv2.
Step 1:
Create a sample console app and add the packages mentioned in the Prerequisites section
Step 2:
The first step for object detection is similar to every other ML.NET application. An ML context needs to be created and the training data needs to be loaded on to it.
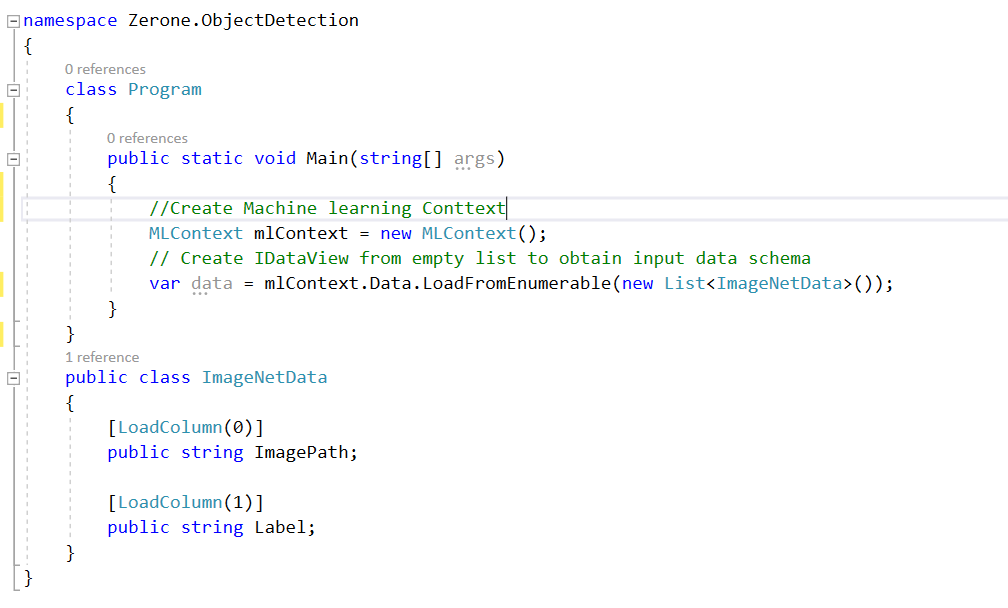
The ImageNetData class represents a class to hold the input data. For object detection, we don’t have a training process. So, we create an empty input to obtain the schema while defining a pipeline
Step 3:
The next step is to create the machine learning model so that we can make object detection using it.
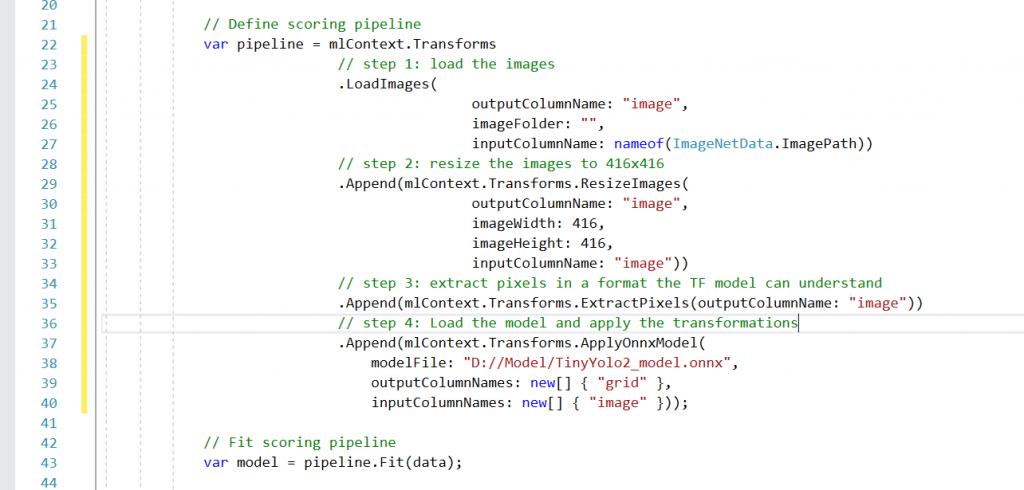
Machine learning models in ML.NET are built with pipelines, which are sequences of data-loading, transformation, and learning components.
The pipeline has the following components:
- LoadImages that load images from disk. The component needs the name of the input column holding the file names, the folder in which to look for images, and the name of the output column to load images.
- ResizeImages which resizes images. This is a required step because the Tiny Yolo V2 model has been trained on 416×416 pixel images. So, we need to present the images using the same size for the model to work.
- ExtractPixels which flattens the image data into a 1-dimensional array of floats.
ApplyOnnxMode l which will load a Tiny Yolo V2 model from disk. This component requires the name of the input node that will receive the image data and the name of the output node that holds the SoftMax predictions. We can easily find these nodes by viewing the Tiny Yolo V2 model in Netron.
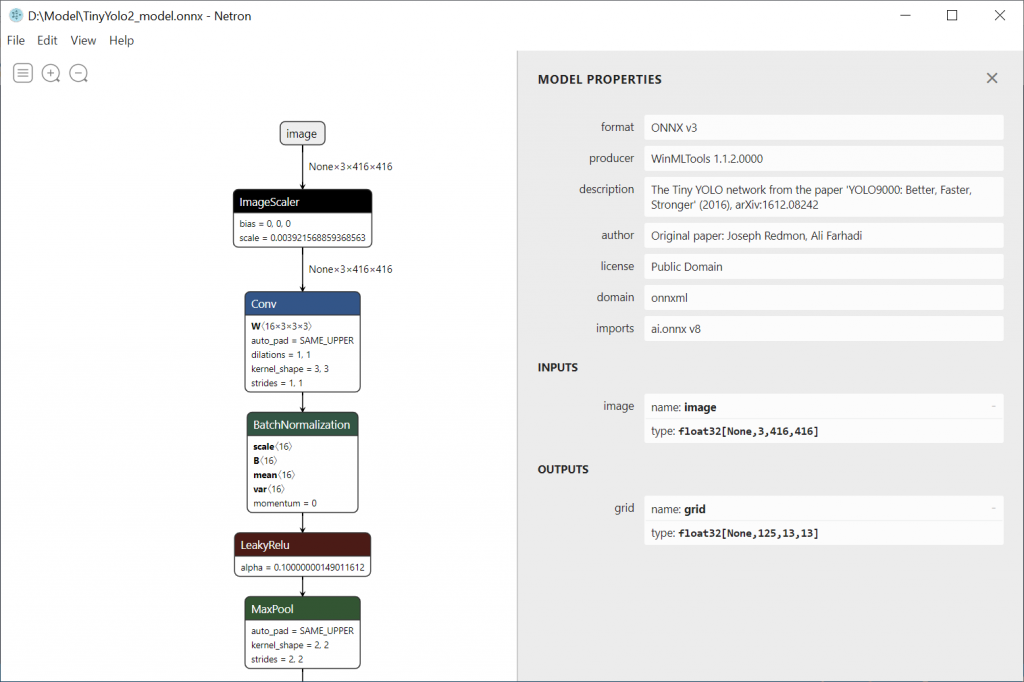
- In our case the input tensor is named ‘image’ and the output is named ‘grid’.
Step 4:
Now that we have our model next step is to load the data

We can add load multiple images. In the sample, only one image has been loaded named Test.jpg
Step 5:
After the model is configured, we need to pass the image to the model to detect objects. When obtaining the prediction, we get an array of floats in the property PredictedLabels. This output is interpreted by YoloOutputParser class and returns a number of bounding boxes for each image. Again, these boxes are filtered so that we retrieve only 5 bounding boxes that have better confidence (how much certain that a box contains the object) for each object of the image.
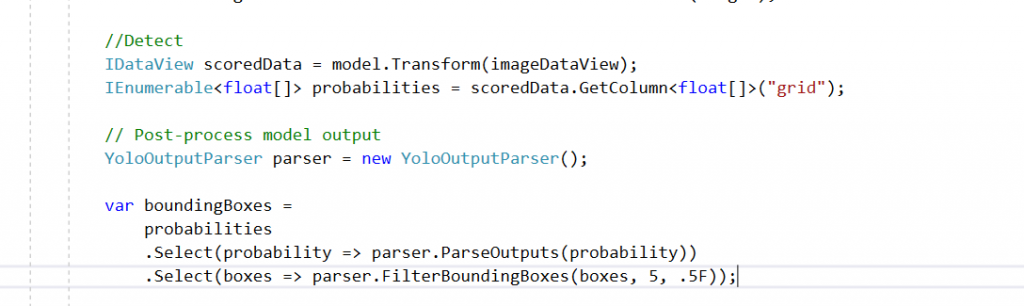
The output parser depends on the trained model we choose. Here the YoloOutputParser is taken from the object detection Sample. If you want to go for another trained model other than yolo, you can customize it according to the chosen trained data.
Step 6:
The next step is to draw bounding boxes to each detected object in the image and save the output image.
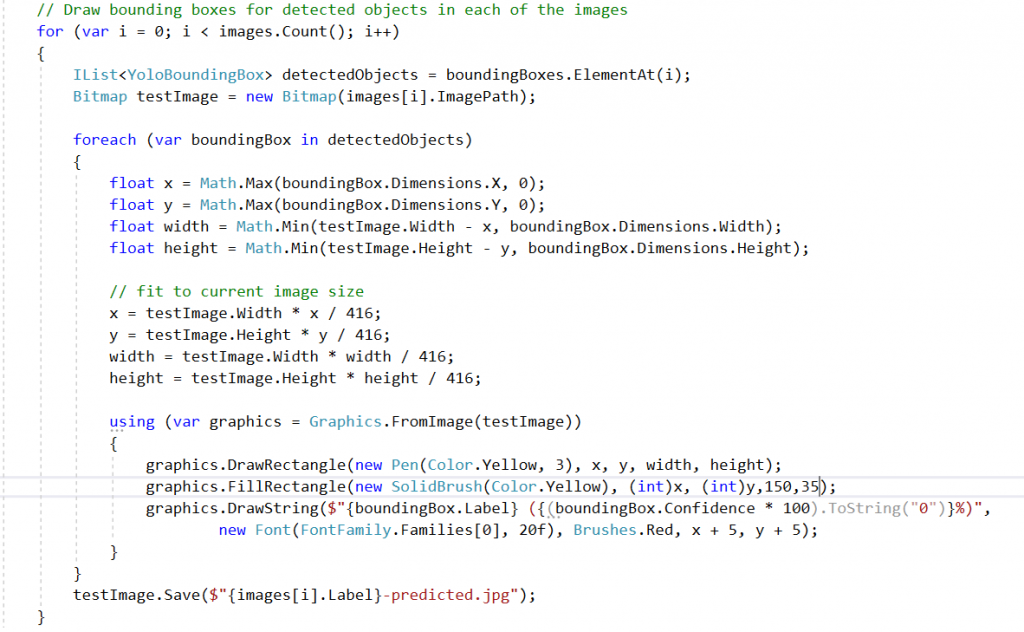
The images with bounding boxes on the objects detected will be created on the output directory with name
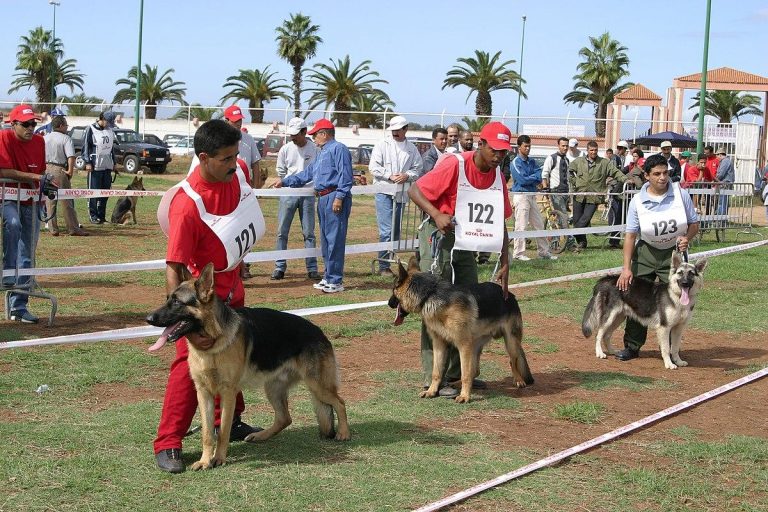
Input Image
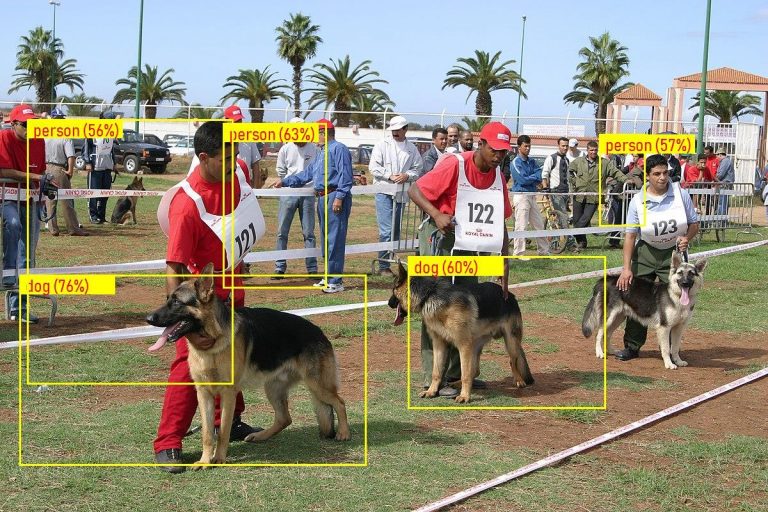
Output Image
We can help!